
The Forgotten Grease Magnet
Let’s be honest: your kitchen hood or ventilation hood, is probably the most hardworking, least appreciated appliance in your home. It stands guard over every stir-fry and sizzling pan of shakshuka, quietly collecting grease, smoke, steam, and odor day after day. And what thanks does it get? Usually, a good wipe… once a year.
We see it all the time — a kitchen that sparkles until you look up. If your cooking vent is sticky to the touch or smells funky when you turn it on, it’s probably long overdue for a proper clean. But don’t panic — you don’t need a hazmat suit. You just need a few good habits, the right tools, and this step-by-step guide.
Why Clean the Ventilation Hood?
Besides the obvious (ick factor), here’s why regular extractor maintenance matters:
- Grease buildup is flammable. A dirty ventilation hood increases fire risk. NFPA: Grease Fire Safety
- Performance drops. The fan can’t pull air properly through clogged filters.
- Odors linger. Old grease smells bad. That’s science.
- Air quality suffers. Clean filters = better indoor ventilation.
Most experts recommend cleaning the exterior weekly and deep-cleaning the grease filters every 1–3 months, depending on how often you cook.
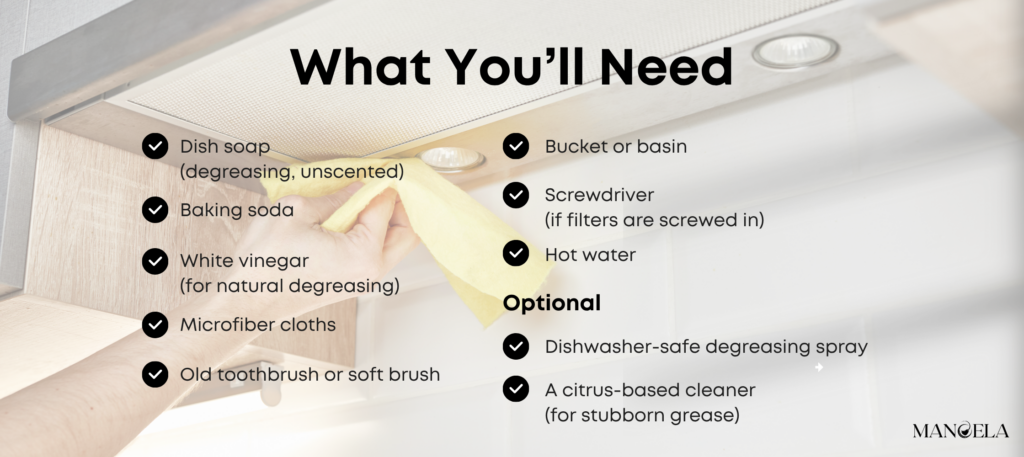
Step-by-Step: How to Clean Your Kitchen Ventilation Hood
1. Turn Off Everything
Make sure the appliance is off and cool to the touch. If your hood has a lightbulb inside, turn it off and give it time to cool.
2. Remove the Filters
Most models have metal mesh or baffle filters that pop out easily. If they’re screwed in, use a screwdriver. Be careful — grease drips are possible.
3. Soak the Filters
Fill your sink or a basin with hot water, add a few tablespoons of dish soap and 1/4 cup of baking soda. Submerge the filters fully. Let them soak for 15–20 minutes.
Try This Tip: For extra grease-fighting power, pour boiling water directly over the filters and add a splash of vinegar. The steam + acid combo breaks down buildup.
4. Scrub Gently
Use a soft brush or an old toothbrush to scrub inside the mesh. Avoid sharp tools that might bend or warp the material.
Rinse thoroughly with warm water and set them aside to dry — ideally upright on a clean towel.
5. Clean the Exterior Surface
Wipe down the outer surface with a microfiber cloth and warm soapy water. Avoid abrasive sponges — they can scratch stainless steel or painted finishes.
Focus on:
- The control panel (gently!)
- Underside of the unit
- The edges where grime tends to gather
Natural Option: Mix vinegar and water 1:1 in a spray bottle for a natural degreaser. Spray, let sit for 2 minutes, wipe.
6. Wipe the Inner Housing
Use a damp cloth to clean the inside of the extractor hood (just above where the filters sit). This area often collects steam and vapor grease. If needed, use the toothbrush for corners.
Be careful around electrical components. Never spray directly inside — always spray the cloth.
7. Dry & Reinstall the Filters
Once the components are fully dry, pop them back into place. Tighten any screws gently.
Admire your work. Take a deep breath. That’s the smell of clean air.
Take a deep breath. That’s the smell of clean air.
How Often Should You Clean It?
- Exterior wipe-down: Weekly
- Grease filters: Every 1–3 months
- Full cleaning: Every 6 months or as needed
If you cook daily (especially with oil or spices), clean more often. For occasional cooks, once a quarter may be enough.
When Should You Replace the Filters?
Cleaning helps prolong the life of your filters, but even the best-maintained ones don’t last forever. Over time, filters lose their efficiency and may start to release odors or show signs of permanent staining.
Here’s a general guide:
- Metal mesh filters: Replace every 3–5 years, depending on usage and wear. If they become warped or rusted, it’s time.
- Charcoal filters (used in recirculating hoods): These cannot be cleaned and must be replaced every 3–6 months for optimal air purification.
If your vent still smells after cleaning, or airflow is noticeably weak, a new filter might be the real solution
Common Mistakes to Avoid
- Using abrasive tools — steel wool scratches.
- Not drying components completely — moisture = mold risk.
- Spraying directly inside the unit — risk of electrical damage.
- Dishwashing non-dishwasher-safe parts — always check the manual.
Want a Pro to Handle It?
Greasy vent maintenance isn’t everyone’s cup of tea. At Manoela , our trained team in Helsinki and Espoo offers deep cleaning services that include hood cleaning — along with the rest of your kitchen.
We use safe, effective products and follow a top-down, detail-first approach that leaves no residue behind. If you’d rather spend your Saturday not elbow-deep in filter sludge, we’ve got you.
Related Read: Cleaning Help 101: Avoid These Mistakes for a Healthier, Happier Home
Reflection Box: The “Out of Sight” Trap
Think of your range hood as your home’s lungs — quietly filtering the air, hidden until it clogs. Regular care isn’t just hygiene — it’s functional feng shui. It helps energy (and oxygen!) move freely.
Let this be the nudge to lift your eyes, reach for that cloth, and give the extractor fan some love. It’s earned it.